|
The Zen Of Handgunning:
The biggest mistake novice
pistoleros make is a simple matter of forgetting the basic
fundamental skills. For some reason, they can tell you what it takes
to shoot, but when they draw the weapon, it all goes out the window.
For me, the biggest reason I enjoy handgun shooting is that it is
more of a challenge. What makes it challenging is that handgunning
is a whole person event. You can't half-ass a pistol shot. It takes
a combination of body and mind and an almost zen-like “one-ness”
with your handgun to make those pistol shots consistent. And it all
starts from the ground up.
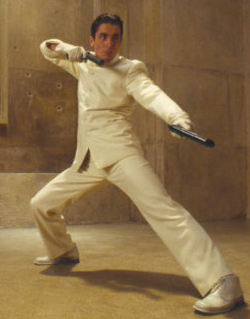
The Stance, is something continually harped on by martial artists...
placement of your feet, your balance on your feet... there is a
reason serious martial artists harp on this so much. Everything is
build off that foundation. For handgunning, it is the same. We are
not tensing up to throw round-house kicks, but we are getting ready
to take some recoil and to possibly make movement. But since we are
not about to Chuck Norris anything, our feet should be shoulder
width apart, nice and comfortable, knees unlocked and just slightly
bent, and our weight just a bit forward... on the balls of the feet
not the heels.
Going along with the stance is a huge debate in the Gunner's
Community about Weaver vs Isosceles... the correct answer is the
same answer as “Mary Anne or Ginger?” The answer is “Both”. We
should learn to use both and to transition seamlessly between the
two. Which one we use and when all depends on the situation. If I am
in an Interview Position, where I am talking to someone who I am not
clear on the identity or Intent of the person – I stand with my
weapon side away from that person. This puts me into the Weaver
position. Should I be facing a potential threat and I'm wearing
armor – I want as much of that armor facing the threat as possible
so I'll be set up for an Isosceles position. And you can't say “I
only use Weaver and nothing else” Well, that's just stupid because
in real life, target engagements do not happen in static positions
like they do on the range. Say, I'm facing a target and it starts
moving from my left to my right – and I track that target with my
weapon, I am swinging through Weaver into Isosceles. Say that target
goes from straight in front of my Weaver position and breaks to my
left – then I bring my right foot forward and I am now into the
Isosceles again. So train with both, because in reality, you will
need both.
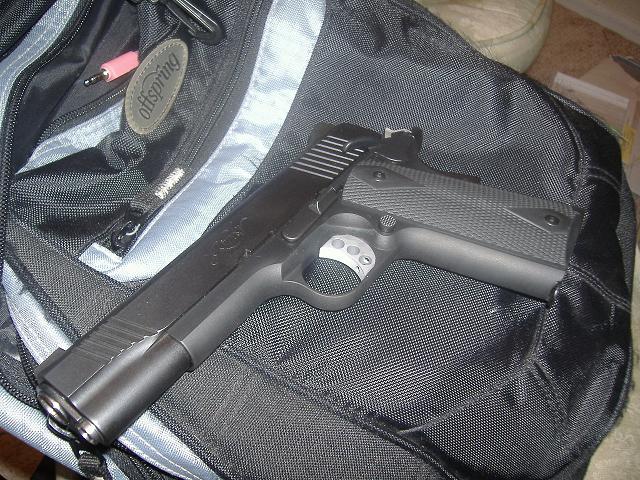
Get a grip: It's almost scary when I hand a person at the gun
counter a pistol and I watch them take up their grip on the gun...
it's really easy to spot the Ignorant and the Novice and the
Braggarts and who is an experienced shooter. Women make the biggest
mistakes in the grip department. The Ladies will often grab the grip
very low, putting all fingers on the grip under the trigger guard,
leaving almost an inch or more between their hand and the beavertail
or base area of the pistol. This is the “I've never shot a gun
before in my life” grip. I especially find it amusing when the guy
gripping the pistol like that has made claims to being Super Secret
Squirrels in the military. Uh huh. The other common problem grip is
the Revolver Grip. This is where the Support Hand's Thumb goes
across the top of the firing hand, behind the pistol. This might be
okay with a Revolver, and maybe that's how you've done it all your
life. But now days when you do that, you run the risk of the slide
hitting your thumb and causing you some sudden discomfort and or
lacerations. The grip should start out with the firing hand with the
pistol inline with the bone of the forearm. This grip should be up
as high on the gun as possible, to put the bore axis as low as
possible. The support hand then wraps around the firing hand
fingers, anchoring the pistol in a vice, with both thumbs together
and if possible, pointing forward. The trigger finger is up along
the frame of he pistol when the pistol is not aimed at the target. A
good grip is critical because because a handgun does two things
during firing. One is the recoil is going to make the gun kick back
and up. Torque is going to want to make the gun twist. You can
Recoil from the mass of the bullet and the pressure of the charge
sending that bullet out of the gun and down range. You get torque
because the barrel has rifling in it to impart spin on the bullet. A
good grip controls Torque and Recoil and minimizes their
disturbance.
The Sight Picture. Often I ask the students what they are looking at
and what their sight picture looks like. I get some strange answers.
First off, the Sight Alignment, how you should align the sights.
Take a look at this simple Paintbrush rendering of a sight picture.
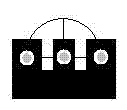
When we are shooting target sights, we use the sights with the top
of the center post even with the rear sights and we center that
across the equator of our target, ( a center hold) or we put the
target on top of the center post, (a 6 O'clock hold) which is the
least ideal sight picture one can have in my opinion. Now, for
Defensive or Tactical shooting, we use just the Dots. Line up the
dots, and put that dot on the center of the target as shown in the
little .gif image. The Sights and the Target together make the Sight
Picture. Now how do we look at the Sight Picture? Our eyes are
trying to focus on 3 things at once... something that they are not
able to do. So where are we looking at? Our eyes should take a sharp
focus on just one thing... the Front Sight Post. In an engagement,
we are looking at the target, first and always... When a threat is
identified, we bring the weapon up into the eye level and we are now
looking at a sight picture. From here, shift your eye's focus to the
Front Sight Post and apply pressure to the trigger. Simple as that.
Don't over-think this. You don't have time. Place the Dot, and Place
the Shot. Nothing else is important to look at.
The Trigger: Triggers get a lot of abuse... They get jerked and
slapped and crushed just beaten on all the time. You can do
everything right, and ruin the shot with even a slight case of
trigger abuse. When you pull the trigger, do so with a steady
pressure until the trigger breaks and the weapon is fired. To do
this right, in a way that is consistent, it requires practice in
large quantities. That means Dry-Fire Practice. So get some
snap-caps and get to work. If you are using a pistol with a round
barrel, balance a coin on it. You should be able to dry-fire the
weapon without the coin falling. I like to use a laser to practice
this as well. If you have a laser mounted to the weapon in the guide
rod or the grip or wherever – great. You can activate the laser and
dry-fire with it. The laser will clearly show you what you are doing
wrong. If you do not have a laser, you can buy a cheap laser pointer
for a couple of bucks. Many of these are the diameter of a pen. You
can put the laser pointer in the barrel. It doesn't have to line up
with the sights. You are not aiming with it. But it will still show
you what is happening. The laser should not move when you dry-fire
the gun. Now, it's important to practice dry-firing just as you
would with live ammo. Important to note – Do not Dry-Fire any
Rim-Fire type firearm without the use of a Snap-Cap. Most of the
time with the laser, you will see the dot jump to the right. This is
sometimes caused by a bad placement of the finger on the trigger.
Use the Pad of the trigger finger, not the knuckle. The pull should
be straight in line with the trigger's arc of motion. Some triggers
have Over Travel. This means the trigger breaks and fires before the
trigger has moved all the way back... this allows the trigger to
jump that last distance and smack the back-wall of the pull and this
could throw the shot off. Over Travel can sometimes be remedied by
the user, or sometimes it needs a Gun Smith to sort it. The trigger
can be gritty, or heavy, or it could stack. Stacking is where the
trigger pull gets heavier just before it breaks. There is a lot that
can be wrong with the trigger pull's qualities... but almost all of
them can be overcome with lots of dry-firing practice. Okay, now
that you have the trigger pulled back, and the weapon is fired –
keep the finger on the trigger. Almost all Novice shooters instantly
at the firing – take their finger off the trigger completely. Then
they start all over again. This isn't good. This leads to Trigger
Abuse. Don't beat your trigger. When you break the shot, keep your
finger on the trigger. If you have a rifle, pistol, revolver,
shotgun... take a moment there at the back wall. This is a part of
Follow Through. Don't let up off the trigger until the Front Sight
is back on the target. Let the trigger forward slowly. You will feel
the trigger reach a point before it's all the way forward where it
clicks. That's the reset. As soon as it resets, start pulling it
back again for your second shot and then so on.
Training Scars: There are tons of Training Scars out there, too many
to deal with. But I'm going to talk about two of them. A Training
Scar is any Bad Habit you have picked up that needs to be worked
out. If you have Training Scars, the best thing to do is to get with
a serious Firearms Trainer to work with you. Your shooting buddy
doesn't qualify. In fact, that could be one of the reasons you have
Training Scars. Find a real Trainer who can watch you and see what
you are doing wrong so he can help you do what is right.
Anticipation can be fun and can sweeten the moment. Like when your
lover comes out wearing some sort of sexy candy wrapper (what you
tear off before consuming) that is some excellent anticipation. For
those to young to know what I mean, think about Christmas Morning
before Mom lets you open those presents. Or if your Extreme-Muslim –
that moment just before Akmed pushes that button to detonate that
vest you made for him. Those are examples of Anticipation. In
shooting, Anticipation is a bad thing. Don't anticipate Recoil. This
leads to an instant before firing where you actually push the gun.
Even just slightly... this can throw your shot off. Anticipation's
Best Friend is Flinch. Flinching is bad, because you can do all
kinds of jacked up things including actually closing your eyes just
before firing. Look, it's a simple as this... you can't hit the
target if your not even looking at the thing. You are also legally
liable for every round that you launch... so it would be in your
best interest to keep your bloody eyes open, okay? Now, if you have
Flinch it's going to take a lot of training to get it out of you.
The best way to get rid of flinch is to take your shooting back to
Square One. Get out the old .22 pistol or even an Air Gun. (Airsoft
isn't accurate enough to really see what you are doing) Start
shooting those low recoil guns, use the laser, and dry fire a lot to
work out any sign of Flinching.

Copyright
G H Hill 1999-2012
|


